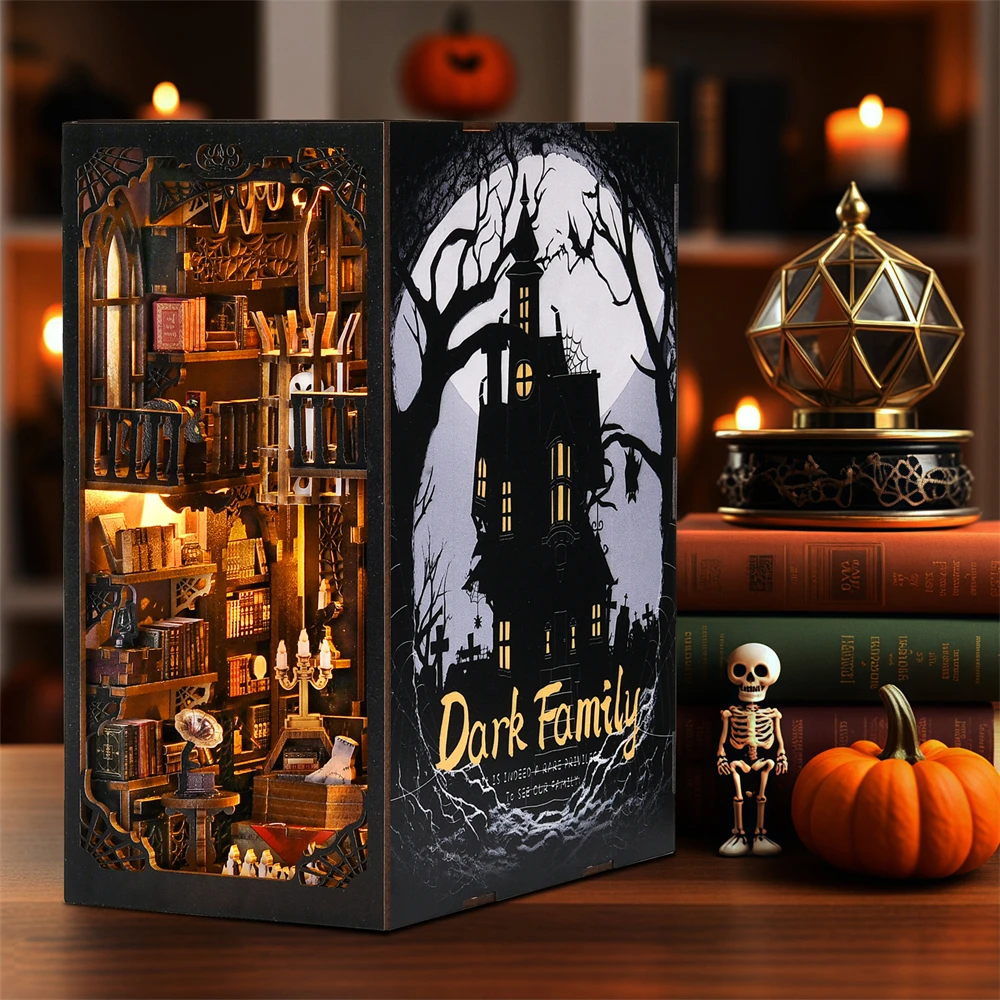
Book Nook Kits: A Halloween Guide to Miniature Bookshelf Scenes
A book nook kit turns a gap on your shelf into a tiny scene. Here is how to pick one, build it well and finish it before Halloween.
 By Ahamed Khan
In this guide14
- 01What a book nook kit actually is
- 02Check the basics before you open the box
- 03Building it so it looks finished
- 04Making it feel like Halloween
- 05Who it suits, and who should skip it
- 06Tools and workspace for a clean build
- 07Pacing the project
- 08Finishing touches that lift the scene
- 09Looking after it
- 10Making it a gift
- 11The bottom line
- 12Submit Your Story
- 13How This Article Was Created
- 14Frequently Asked Questions
Somewhere between a model kit and a piece of decor sits the book nook. You build a small scene out of wooden pieces, then slide it between two books so your shelf has a little window in it. With Halloween close, a gothic book nook kit is one of the nicer weekend projects you can finish in time.
I like these kits because the result is not a craft you hide in a drawer. It sits on a shelf where you see it every day. Before you start, though, it helps to know what you are buying and where people usually go wrong.
What a book nook kit actually is
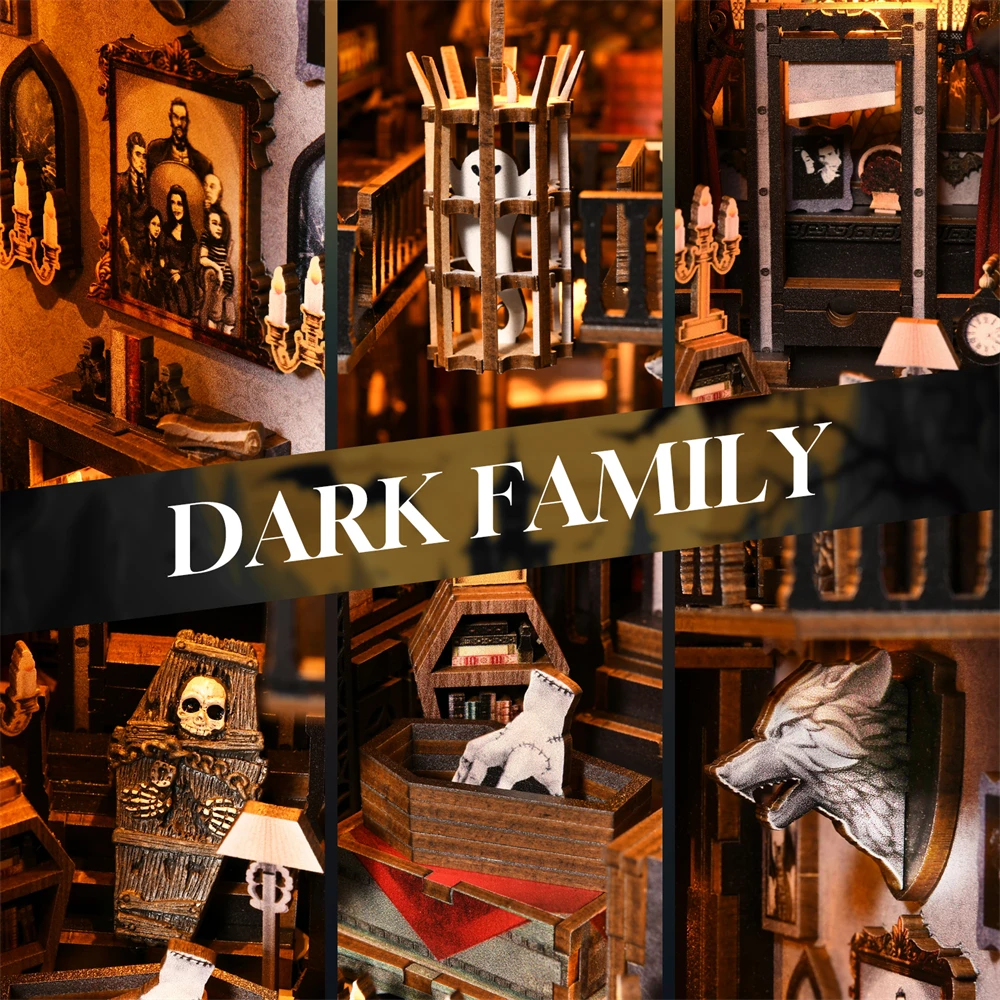
A book nook is a miniature room or street, built in layers, that fits into the gap between books. Most kits are laser-cut wooden panels that you press out, sand lightly if needed, glue together and fit with small details. Some include a light strip. The scene gives the illusion of depth, so a narrow shelf slot looks like a tiny alley or parlour.
The kit we list is a gothic, dark-family scene in wood. It is sold for ages 14 and up, and it carries a clear warning about small parts that must not be swallowed. That is worth taking seriously if there are young children or pets in the house while you work.

Check the basics before you open the box
First, look at the size of the finished piece against your shelf. Book nooks are narrow by design, but a deep scene still needs a gap about as wide as a couple of paperbacks. Measure the space you have, then compare it with the kit’s listed dimensions.
Second, look at what is not in the box. Wooden kits usually need a small tube of clear craft glue, tweezers and a few clamps or clothes pegs. A pair of sharp scissors and a cutting mat help too. If you are short of any of these, get them before the weekend, not during it.
Third, decide where the light will come from. A dark scene looks best with a small warm light behind it. If your kit does not include one, a battery tea light placed nearby gives a similar glow without any wiring.
Building it so it looks finished
Dry-fit every piece first. Lay the panels out in order and press them together without glue, so you can see how the layers stack. Wood tabs sometimes need a very light sand to slot in cleanly, and it is far easier to fix this before glue is involved.
Use less glue than you think. A thin line on the tab is enough, and too much will squeeze out and show on dark wood. Wipe excess straight away with a damp cotton bud. Work in short stages and let each stage set while you start the next small part.
Take your time on the tiny details. Figures, windows and railings are where a good build stands out. Tweezers help you place them squarely, and a pair of pegs hold thin parts while the glue grips.
Making it feel like Halloween
You can lean into the theme without changing the kit. Place the nook between dark book spines, add a small orange or purple light, and put a few real props on the shelf in front of it, like a candle holder or a bundle of dried stems. A single prop is plenty. The aim is to draw the eye to the scene, not to bury it.
If you enjoy ambience projects, our guide to Star Projectors: Why Your Ceiling Matters More Than the Device covers other ways to change how a room feels after dark.
Who it suits, and who should skip it
A book nook suits people who enjoy slow, careful projects and want something they can display. It also makes a thoughtful gift for a reader. It is not the right pick if you want something you can finish in twenty minutes, or if you are buying for a young child.
If you order for Halloween, allow time. We ship from a US warehouse to US addresses with tracking, and delivery options with estimated days appear at checkout before you pay. Order early in the week and you will have a weekend to build it.
Tools and workspace for a clean build
A tidy table makes the difference between a relaxed evening and a frustrating one. Lay down a cutting mat or a sheet of thick card, and keep a small tray for the pieces so none roll away. Wooden kits come on punched sheets, and the little parts are the easiest to lose. Press them out one section at a time and keep each group in its own cup or lid.
Good light matters more than people expect. A desk lamp angled from the side shows the grain of the wood and makes the tabs easy to line up. If you wear reading glasses, put them on before you start. Very small figures and railings are hard to place when you are squinting.
Have a damp cloth and a few cotton buds within reach. Glue is easiest to clean off while it is still wet, and a clean finger is much better than a sticky one when you are holding a thin panel upright.
Pacing the project
A scene like this is not something to rush in one sitting. A sensible plan is to split the work into three short sessions. In the first, press out and sort the pieces, then dry-fit the main frame. In the second, glue the structure and let it dry fully overnight. In the third, add the small details and do the final touches.
Giving the glue time to set is the best habit you can build. Pieces that are handled too soon can shift, and a scene that is slightly out of square is hard to correct later. If you are working to a Halloween deadline, count backwards from the date you want it on the shelf and leave a spare evening at the end.
Finishing touches that lift the scene
Once the build is done, small additions give it character. A tiny strip of battery-powered warm light tucked behind the scene throws a glow through the windows. A dab of paint on a few edges can add depth, but go gently and test on a hidden spot first. Some people add a little dried moss or fine sand to the base, which hides the join between the nook and the shelf.
Think about the books around it, too. Dark, plain spines make the scene stand out, while brightly coloured covers fight with it. If you have a shelf of colourful paperbacks, group a few darker ones either side so the nook has a calm frame.
Looking after it
Wood is sensitive to damp, so keep the nook away from a steamy kitchen or a window that gets a lot of condensation. Dust it with a soft brush every so often, because fine detail traps dust quickly. If a piece comes loose over time, a tiny drop of glue and a minute of holding it in place is usually all it needs.
Because the scene sits between books, it is protected from most knocks. Even so, lift it out by its base and not by a delicate top edge, and store it flat if you pack it away after the season.
Making it a gift
A book nook is a thoughtful gift for a reader, but remember the age guidance: it is recommended for ages 14 and up. If you are giving it as a kit, add a small tube of glue and a pair of tweezers, so the person can start straight away. If you build it yourself first, it makes a one-of-a-kind present that has your effort in it.
The bottom line
A good book nook kit gives you a quiet project and a small piece of decor you made yourself. If the gothic style appeals, the Gothic Halloween Book Nook Kit is a sensible place to start. Browse more items that ship from US warehouses in our US store, or see everything in Crafts & Hobbies.

Gothic Halloween Book Nook Kit, DIY Wooden Bookshelf Insert
A gothic Halloween book nook kit: build a miniature dark-family scene from wooden pieces and slot it between the books on your shelf. Ships from a US warehouse to US addresses. Card payments via secure checkout.
$53.99
View productSubmit Your Story
Have you built a book nook or another miniature scene? Which part was the hardest to get right? Share it through our contact page and we may feature it in a future article.
How This Article Was Created
This guide was written from the product details on our listing and from widely known buying considerations for this kind of item. We do not quote statistics we cannot source, and we describe only features shown on the product page, so check the page for current options, sizes and prices. Items in this article ship from a US warehouse to US addresses only.
Frequently Asked Questions
What is a book nook kit?
It is a miniature diorama that slots between books on a shelf, often a lit alleyway or shop scene you build from pre-cut parts, glue and small LED lights.
Are book nook kits hard to assemble?
Most take a few focused evenings. They suit patient hobbyists; look for clear instructions, numbered parts and a kit difficulty rating before buying for a beginner.
Do book nook kits come with lights?
Many include LED strips powered by USB or batteries. Check whether a power source is included, since the lighting is what makes the finished scene stand out.